ConRod Bolt Replacement
Conrod bolt replacement at one time was highly recommended for engines producing more than 1.3bar (320bhp) due to a risk that the standard bolts could stretch under high rpm and cause a shell to spin. These days its not the done thing but i've kept it on the site as its a half interesting read and it is something you may consider doing depending on your own personal view.
At the time of fitment, I was really wanting to get this job done professionally, unfortunately due to finances i had to do it myself. As it turned out it didnt go *too* bad. One tool i would recommend is a Impact Hammer with a 8mm fine thread, to draw the bolts through the con-rods as they are an interference fit and as such it needs to be done correctly. Dont forget to apply the special moly grease to all surfaces before torquing the nuts down (37ft/lb). Sump nuts should be tighened to 7nm apparently but i never bothered, they are short 6mm bolts so just be gentle with them ;)
At the time of fitment, I was really wanting to get this job done professionally, unfortunately due to finances i had to do it myself. As it turned out it didnt go *too* bad. One tool i would recommend is a Impact Hammer with a 8mm fine thread, to draw the bolts through the con-rods as they are an interference fit and as such it needs to be done correctly. Dont forget to apply the special moly grease to all surfaces before torquing the nuts down (37ft/lb). Sump nuts should be tighened to 7nm apparently but i never bothered, they are short 6mm bolts so just be gentle with them ;)
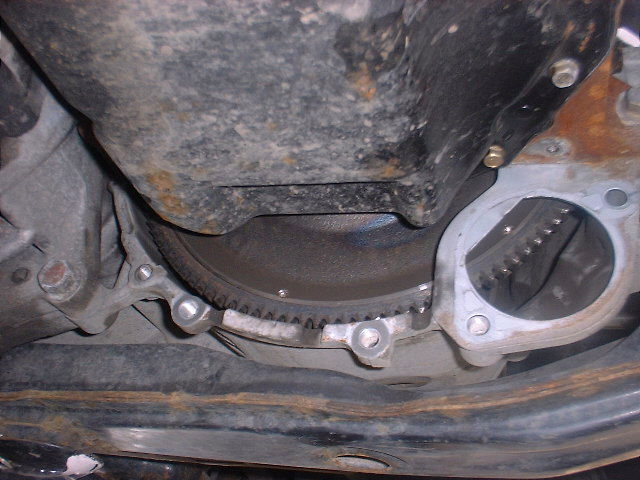
First off disconnect the battery! The downpipe has to be removed.I dropped the oil while i waited for it to cool alittle ;) Remove the starter motor and flywheel cover, note that the top mounting bolt for the starter motor is accessed from the other side to which the motor is at.
Note the discolouration on the flywheel, looks like somethings been getting alittle warm!
Note the discolouration on the flywheel, looks like somethings been getting alittle warm!

This is the pack as it comes, you can see the bolts and also the moly grease. According to the blurb upto 85% of the torque can be lost due to friction between the nuts and bolts!! The Loctite 518 is the sealer that i used to reseal the sump.Its specifically designed for sealing aluminium sumps and has a temperature rating of upto 150*c.
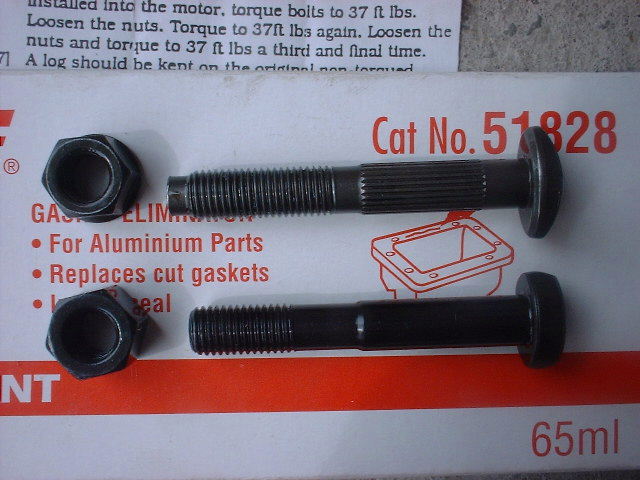
Standard nut top, ARP bottom. These things are tiny esp. when you think of the forces that they are put under!

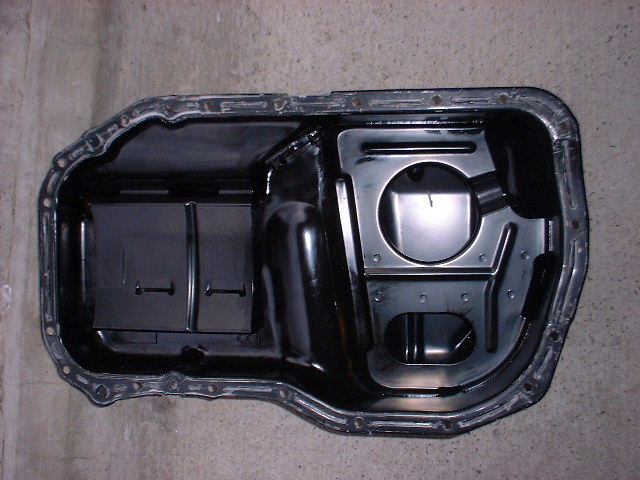
Sump removal is relatively easy in theory, you just undo all the 6mm bolts.The problem been is getting the dam thing unstuck from the bottom of the sump! Be gentle with the pry bar and it`ll part company......eventually! ;) I found it difficult to actually get the sump to fully come off.It was just sat there hanging 1" below the engine and wouldn't drop any further.
Turns out it was the oil pick-up where it passes through into the bottom of the sump, alittle more jiggling about at it fell completely away leaving the bottom of the engine as it looks in the picture opposite.
Turns out it was the oil pick-up where it passes through into the bottom of the sump, alittle more jiggling about at it fell completely away leaving the bottom of the engine as it looks in the picture opposite.

After the steel plate has been undone and swung away to one side, you can get access to all the bolts. Manually turn the engine by hand to get to all the bolts.This is done by inserting a 1/2" drive through the offside inner wing and rotating the pulley. Best bet is to use a slide hammer with a 8mm fine thread to pull the bolts through.I didnt have one(and drove all around Leeds trying to find one!) so i ended up drawing the bolts through the conrods by simply tightening the nuts up on the bottom.Its a "key" fit where it sits in the top of the rod, and as such makes sure that its sat all the way down before torquing up.I had to sit the bolt slightly off to where i wanted it to be, as it turned a few degrees when been pulled through by the nut.
Cleaning all the old sealer from the sump and bottom of the engine is a pain, and is made easier by use of a Stanley knife blade and carb cleaner.

Apply sealer evenly across the face of the joint.The Loctite 518 is very similar to thread lock, in that it only cures when theres a lack of oxygen. Once refitted i left it overnight to cure, but Loctite claim two hours is enough. The fact that any excess sealer on the outside of the joint is still wet after 24hrs does`nt inspire confidence mind ;)
Once the sump`s fitted (7Nm for the 6mm bolts), the flywheel cover, starter motor and exhaust can all be refitted. Reconnect the battery, re-fill the engine with oil checking that you have no leaks, and fire her up! No rattles or knocking? ..Job`s a good one.
Running the car for the next 200 miles i took things gently, just to allow anything that i may have disturbed to bed back in correctly.
